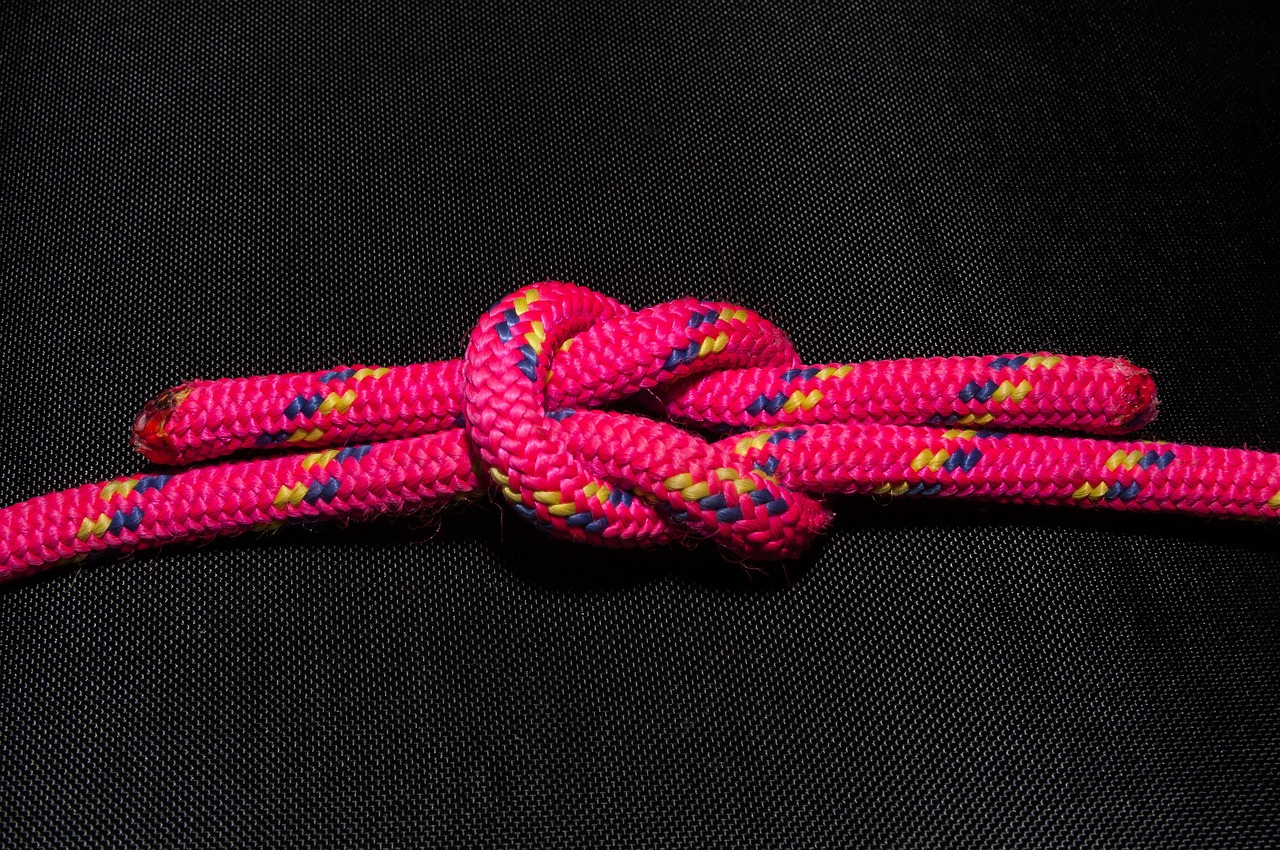
Reef Knot
Five useful knots for campers and hikers enjoying British Columbia’s outdoors
By Amy Clausen
If you camp and hike, chances are you have pitched a tarp, tied down your tent’s fly in a storm, or bagged up your food and hung it from a tree, out of the reach of hungry bears. You may have learned to tie a few useful knots from your days in Scouts, or from your experience sailing or climbing. If, like me, you have never learned proper knot tying techniques, you risk your safety and convenience around camp. With the right basic knowledge and some practice, a number of knots can improve safety, security and the overall outdoor experience.
Luckily, there are a number of resources online to help beginners like me to learn the basics. Using a simple, visual interface, some apps even show a short video or moving graphic to simulate the tying of each knot. The great news is that many of these apps are free, and you can use them to practice tying knots before you need to try them out on your next trip! One tip is to take some short pieces of rope and practice around the campfire with your family and friends. It is fun to make it a speed or best aesthetics competition.
Here are five common knots to try learning and to have in your knowledge bank:
Reef (Square) Knot: This is a basic knot to know and master. Although it is prone to slipping unless cinched tightly, it has many variations including the more secure surgeon’s knot. It is most useful for joining two ropes of equal weight together when you need extra length for example to hang a tarp or longer clothesline, however it should never carry a heavy critical load. To tie the knot it is right over left an under, and then tying again in the reverse direction – left over right and under.
Reef Knot
Bowline: This knot leaves you with a stable loop at the end of the rope with which you can lower or raise objects, for example. Use it at the end of one rope to raise your food and trash bags into a tree while camping in areas frequented by bears. This knot is also useful in rescue scenarios. In Scouts they teach you the story of the rabbit coming out of the hole, in front of the tree, going behind the tree, and back down his original hole as a way to learn to tie the bowline. Basically you create a loop at one end a rope and then pass the free end of the rope (the short end) through the loop and then bring this short end around behind the longer rope. Bring the free rope end down in the original loop, while maintaining the secondary loop which becomes your Bowline loop. Once tied it is cinched tight.

Bowline Knot
Sheet Bend: This knot is used to tie two different thicknesses of rope or rope of different materials together. The thicker rope is put shaped into a J or fish hook shape and then the thinner rope is put through the J from behind, wrapped around the entire J once and then the small rope is tucked under itself. No picture available – check the web.
Clove Hitch: This simple knot is easy to tie and is suitable for some situations, but may slip if used on its own, or if constant pressure is not maintained on the line. Use to tie rope to a standing pole, or a tree, but use with caution! To tie make a loop of rope around the tree. Then make another loop around the tree and pass the free end of the rope under the second loop before tightening.

Clove Hitch Knot
Two Half-Hitches: This is a secure knot for tying tarps to trees and poles, or even supporting a hammock. Learn the half hitch first and then experiment with more complex knots and variations. It is a very simple knot to tie. Once you have wrapped the rope around a tree make the first Half Hitch, then you’ll wrap around the line in the same direction again to make the second Half Hitch.

Two Half-hitches Knot
Here are some sites to visit to learn more about tying knots and their uses:
Photo credits source from pixabay.
Published: May 5, 2015
Last Updated: October 17, 2018

About the Author
Amy Clausen is an avid camper and the blogger behind ladycamping.com. She is an arts and outdoor educator, and a UBC student. She hikes and kayaks with her family, and enjoys road trips to historic BC towns. She lives in beautiful Port Coquitlam with her partner and young child.

Categories
- Accommodation
- Activity
- Beachcombing
- Biking
- Breweries & Cideries
- Campfire Activity
- Chair Lift or Gondola
- Childrens Activity
- Dancing or Music
- Dining
- Drives and Circle Tours
- Eating
- Farm Animals
- Farmers Markets
- Ferry Ride
- Festival
- Film Buffing
- Fishing
- Flying
- Four by Fouring
- Gold Panning
- Golfing
- Hiking
- Hockey
- Horse Racing
- Hot Springs
- Kayaking
- Motorcycle Camping
- Music
- Paddleboarding
- Plants & Berries
- Rafting
- Running or Walking
- Shopping & Gifts
- Skating
- Skiing
- Snowshoeing
- Star Gazing
- Storm Watching
- Sweets and Candy
- Swimming
- Watersports
- Wildlife Viewing
- Wine Tours
- Ziplining & Adventure Parks
- Attraction
- British Columbia
Popular Posts
- Taking a Break Along the Coquihalla Highway 5, British Columbia, Canada
- Explore Upana Caves near Gold River, Vancouver Island, British Columbia
- Visit Spectacular Wells Gray Waterfalls, British Columbia
- Hiking Meares Island, Tofino, British Columbia
- Travel the Kettle Valley Railway Tour in British Columbia’s Okanagan
BC Lodging & Campgrounds Association
209 - 3003 St John's Street
Port Moody, BC
Canada V3H 2C4